> For the complete documentation index, see [llms.txt](https://help.connected.illumina.com/llms.txt). Markdown versions of documentation pages are available by appending `.md` to page URLs; this page is available as [Markdown](https://help.connected.illumina.com/dragen-stratamap/illumina-stratamap-image-tool/image-processing/homepage.md).
# Homepage
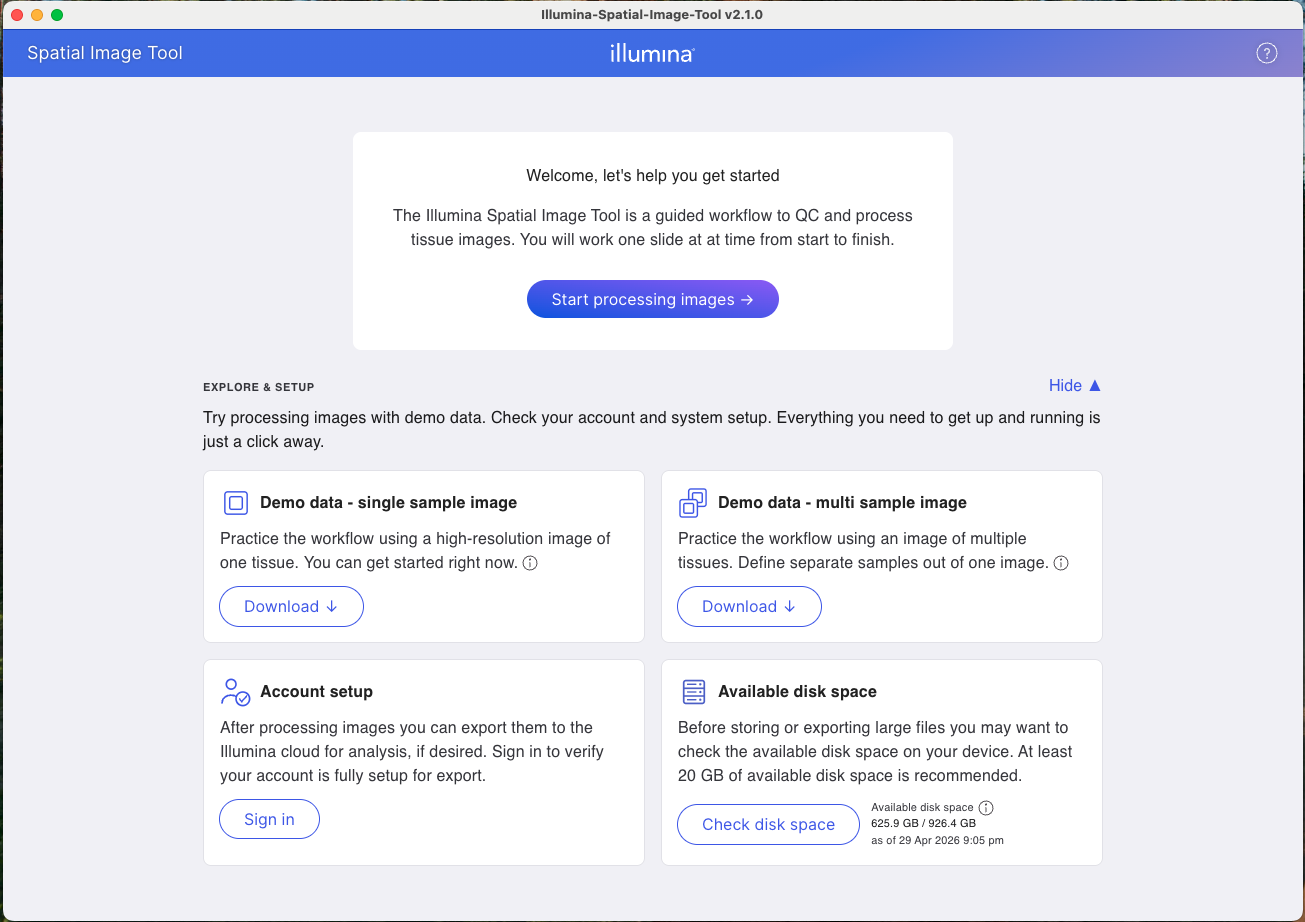
The homepage is displayed when the application is launched. This screen provides access to the main image processing workflow and initial setup options.
The **Start processing images** button initiates the guided workflow for QC and processing of tissue images. Each session processes one slide from start to finish.
#### Explore & Setup
The Explore & Setup section contains the following options:
| Option | Description |
| ----------------------------------- | ---------------------------------------------------------------------------------------------------------------------------------------------------------------------------------------------------------------------------------------------------------------------------------------------------------------------------------------------------- |
| **Demo data - single sample image** | Downloads a sample high-resolution image containing one tissue section. Recommended for users who want to try the workflow but do not yet have images to process. |
| **Demo data - multi sample image** | Downloads a sample image containing multiple tissue sections. Use this option to practice defining separate samples within a single image. |
| **Account setup** | Opens the sign-in dialog to try logging in with your Illumina cloud credentials. Account setup is required to export processed images to ICA for downstream analysis. **NOTE: this is only a test. You will need to log in again at the end to actually send the images. Use this only to test whether your cloud project is configured correctly.** |
| **Available disk space** | Displays current disk space availability. A minimum of 20 GB of available disk space is recommended before processing images. |
#### Help Menu
The **?** icon in the top-right corner of the application window provides access to:
* Software version number
* Activity logs for troubleshooting
* Documentation
---
# Agent Instructions
This documentation is published with GitBook. GitBook is the documentation platform designed so that both humans and AI agents can read, navigate, and reason over technical content effectively. Learn more at gitbook.com.
## Querying This Documentation
If you need additional information that is not directly available in this page, you can query the documentation dynamically by asking a question.
Perform an HTTP GET request on the current page URL with the `ask` query parameter, and the optional `goal` query parameter:
```
GET https://help.connected.illumina.com/dragen-stratamap/illumina-stratamap-image-tool/image-processing/homepage.md?ask=&goal=
```
`ask` is the immediate question: it should be specific, self-contained, and written in natural language.
`goal` is optional and describes the broader end goal you are ultimately trying to accomplish on behalf of the user. GitBook uses it to tailor the answer towards what is most useful for that goal.
The response will contain a direct answer to the question and relevant excerpts and sources from the documentation.
Use this mechanism when the answer is not explicitly present in the current page, you need clarification or additional context, or you want to retrieve related documentation sections.