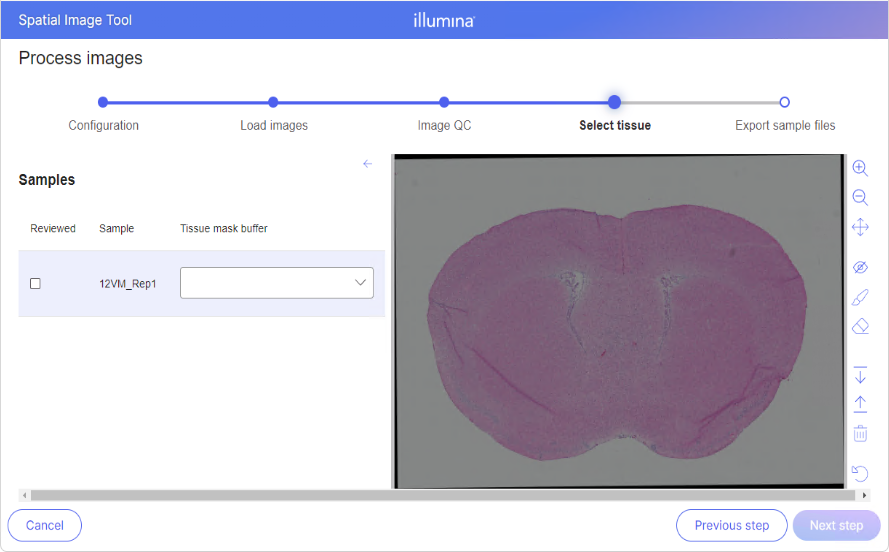
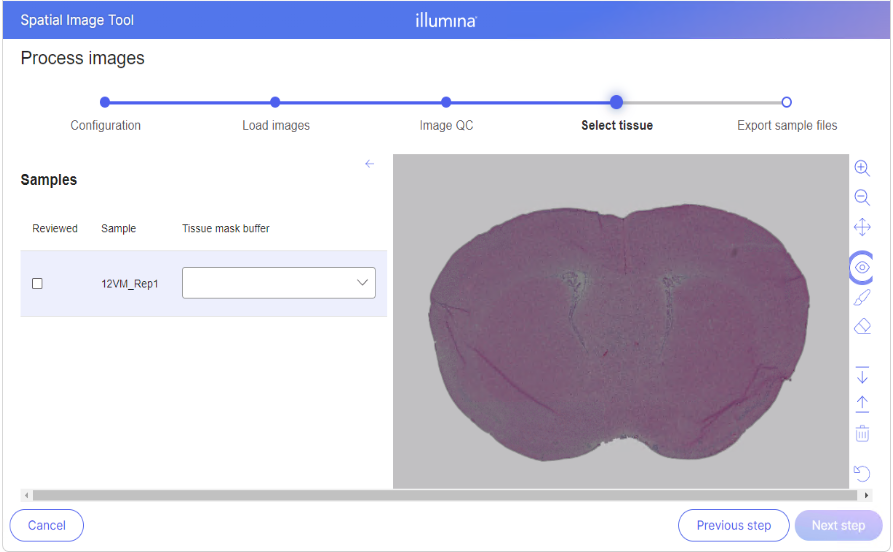
Review of Tissue Mask
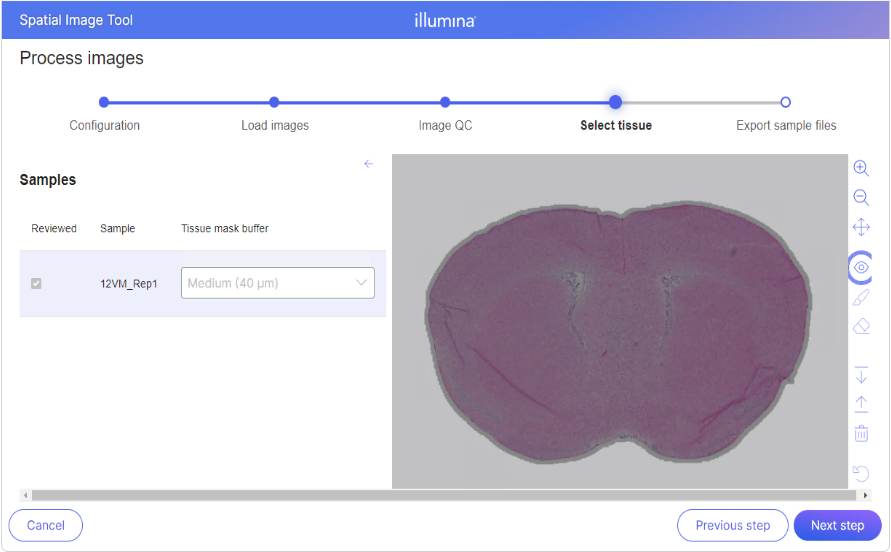
Reviewed Tissue mask with Medium buffer
 | Zoom in | |
|
| Zoom in | |
|  | Zoom out | |
|
| Zoom out | |
|  | Pan mode | |
|
| Pan mode | |
|   | Apply/Unapply mask | Display the effect of applying the mask to the tissue image. |
|
 | Apply/Unapply mask | Display the effect of applying the mask to the tissue image. |
|  | "Add" brush | Brush for adding area of interest. The brush is a circle shape. Selected regions will show as a blue overlay. |
|
| "Add" brush | Brush for adding area of interest. The brush is a circle shape. Selected regions will show as a blue overlay. |
|  | "Delete" brush | Brush for subtracting from area of interest. The brush is a circle shape. |
|
| "Delete" brush | Brush for subtracting from area of interest. The brush is a circle shape. |
|  | Download image | Downloads the tissue image to create a mask using a third-party tool. |
|
| Download image | Downloads the tissue image to create a mask using a third-party tool. |
|  | Upload external mask | Uploads a mask generated by a third-party tool into the mask editor, replacing the auto-generated mask. |
|
| Upload external mask | Uploads a mask generated by a third-party tool into the mask editor, replacing the auto-generated mask. |
|  | Delete/remove external mask | Removes the previously uploaded external mask and replaces it with the auto-generated mask. |
|
| Delete/remove external mask | Removes the previously uploaded external mask and replaces it with the auto-generated mask. |
|  | Reset | Revert all changes back to the original state, as if the `Tissue selection` page was just loaded for the first time. |
These icons are enabled and disabled dynamically, depending on the state of the active/current sample. For example, when the current sample is in the `Reviewed` state, most of the icons will be disabled.
#### Brush Tool
When the Brush Tool is selected, the existing mask shows as blue, and regions can be added to the tissue area to be analyzed via the circle stamp.
| Reset | Revert all changes back to the original state, as if the `Tissue selection` page was just loaded for the first time. |
These icons are enabled and disabled dynamically, depending on the state of the active/current sample. For example, when the current sample is in the `Reviewed` state, most of the icons will be disabled.
#### Brush Tool
When the Brush Tool is selected, the existing mask shows as blue, and regions can be added to the tissue area to be analyzed via the circle stamp.
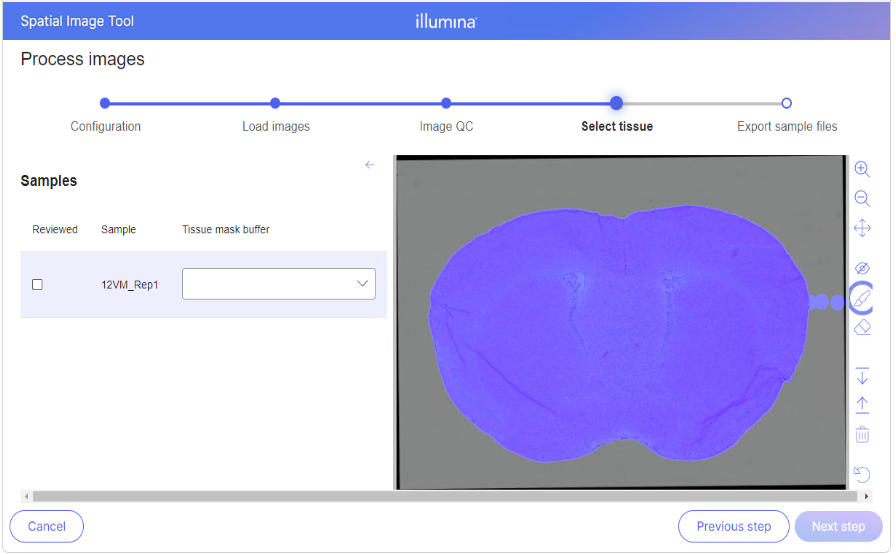
See circle brush stamps added on the right